Translate and Rotate Entities
Use the Move tool to translate and rotate selected entities.
-
From the Home tools, click the Move tool.

Figure 1.The Move tool will initially be positioned at the centroid of selected entities. - Optional:
Click
 on the guide bar to define movement options.
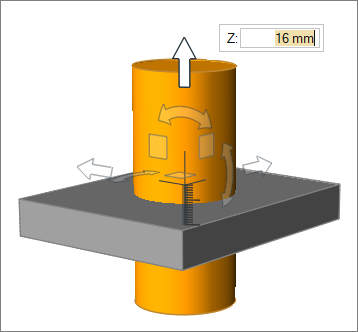
Figure 2.
Tip:
- Use snap points to align entities by clicking-and-dragging a snap point on one entity to the snap point on a second entity.
- Click the center of the Move tool to bring up the
menu.
- Click
 to align the
Move tool with the global axis.
to align the
Move tool with the global axis. - Click
 to align the
Move tool along an edge or face. If the
Move tool is being repositioned
(highlighted orange), clicking this button will force the Move tool to be aligned automatically as you
drag it around the model.
to align the
Move tool along an edge or face. If the
Move tool is being repositioned
(highlighted orange), clicking this button will force the Move tool to be aligned automatically as you
drag it around the model.
- Click
- Reposition the Move tool by holding Shift and dragging a graphic manipulator. You can also
double-click a graphic manipulator to enter editing mode. The Move tool is highlighted orange when being
repositioned.
- Change the center of rotation by dragging the tool's center or graphic manipulators.
- Rotate and align the Move tool with an entity by clicking-and-dragging a snap point at the end of an arrow. The appropriate rotation manipulator will become active, enabling you to resolve the remaining degree of freedom.
- On the guide bar, click
 to open the
Advanced Selection dialog, from which you can
filter geometry further by selecting a subset of entities based on
additional selection methods, such as By Component or By
Assembly.
to open the
Advanced Selection dialog, from which you can
filter geometry further by selecting a subset of entities based on
additional selection methods, such as By Component or By
Assembly.
Transform Elements
Translate, scale, reflect or rotate elements with multiple numbers of copies, including properties and loads, attached to them.
-
From the Home tools, click the
Transformation Tool.

Figure 3.The Transformation Tool dialog opens.
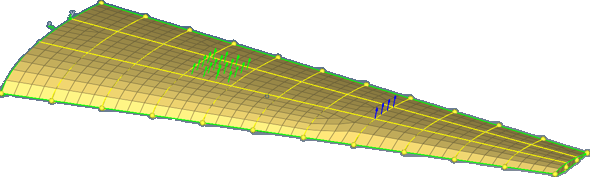
Figure 4. Element to be Transformed with Loads
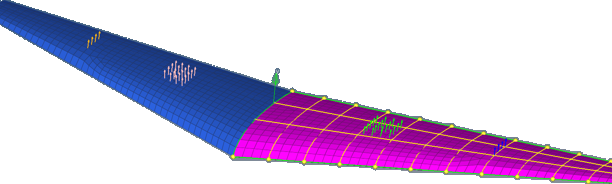
Figure 5. Reflected Wing with Loads in a New Load Collector
Move Options
- Move mesh in real time
- Show updated mesh connectivity in real time while moving nodes and elements, or show it only when releasing the mouse after each move. Turn off to improve performance on larger models.
Keyboard Shortcuts & Mouse Controls
| To do this | Press |
|---|---|
| Reposition the Move tool | Shift + Left Mouse Drag or Double Click |
| Temporarily disable snapping | Alt |