RD-T: 3560 Bottle Drop
This tutorial demonstrates how to simulate a Bottle Drop Test containing water and air. The objective is to evaluate the diffusivity of water and air in the bottle on drop.
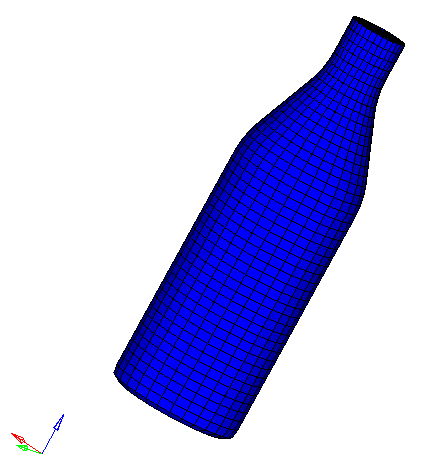
Figure 1.
Load the Radioss User Profile
- Launch HyperWorks Desktop.
-
From the Preferences menu, select User Profiles or click
the
 icon in toolbar.
- Select Radioss (Block140) and click OK.
Open the Model File
-
Click the Open Model icon
 to open the bottle.hm file
you saved to your working directory from the radioss.zip
file.
to open the bottle.hm file
you saved to your working directory from the radioss.zip
file.
Create the Materials for Air and Water
-
Input the values as shown below. Remember to select ALE
under ALE CFD Formulation.

Figure 2. - Input the values, as shown below.
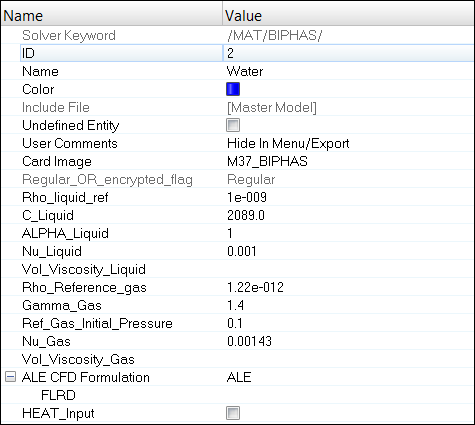
Figure 3.
Load the Stress-Strain Curve
-
Click create and then click
return.

Figure 4.
Create the Material for Bottle
-
Input the values as shown below:
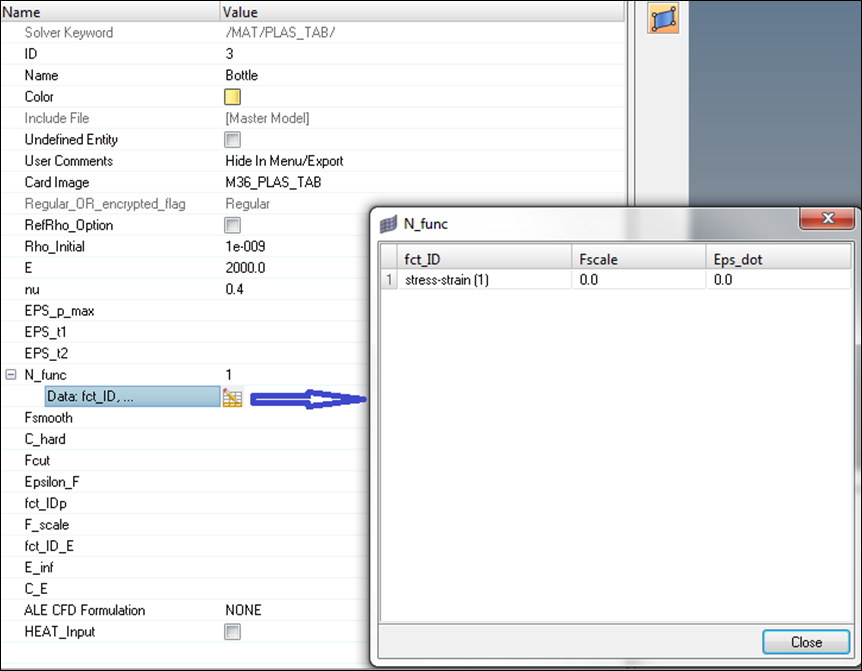
Figure 5.
Create and Assign the Property for Air
- Enter parameters, as shown below.
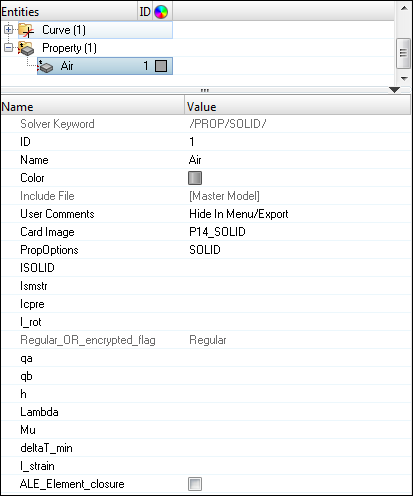
Figure 6.
Create and Assign the Property for Water
- Enter parameters, as shown below.
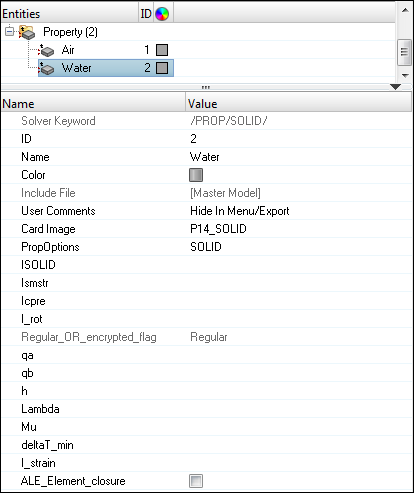
Figure 7.
Create and Assign the Property for Bottle
Define an Interface between Bottle and Water
-
Click OK to complete the selection.
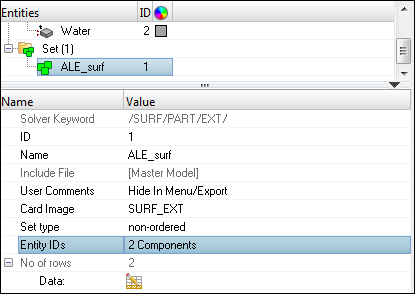
Figure 8. -
In the Select Components dialog, select
Bottle and click OK.
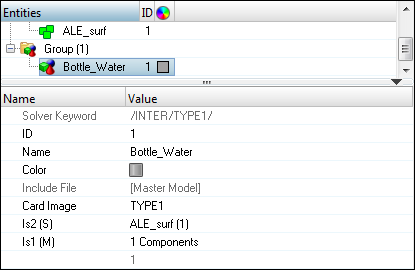
Figure 9.
Create the Initial Velocity for Bottle
-
Click Create to create the imposed velocity boundary
condition.
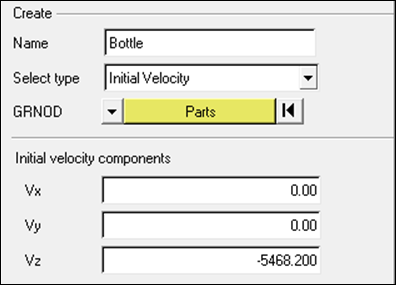
Figure 10.
Create the Initial Velocity for Water and Air
-
Change the Type to T+G and click
return to complete the definition.
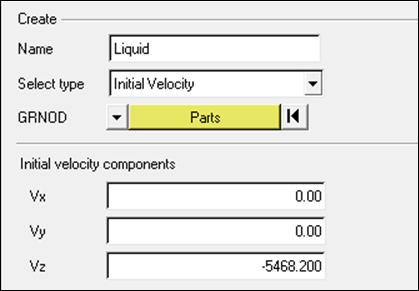
Figure 11.
Create the Rigid Wall
-
Set d to 250.0.
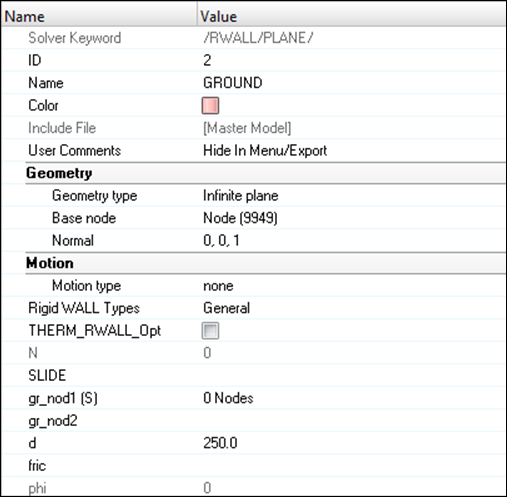
Figure 12.
Create Output Request and Control Cards
Export the Model
-
Click or click the Export icon
 .
.
-
Click the folder icon
 and navigate to the
destination directory where you want to export to.
and navigate to the
destination directory where you want to export to.
- For Name, enter bottle and click Save.
- Click the downward-pointing arrows next to Export options to expand the panel.
- Select Merge starter and engine file to export both the Starter and Engine file in one file.
- Click Export to export the file.
Review the Results
The exercise is complete. Save your work to a HyperMesh file.
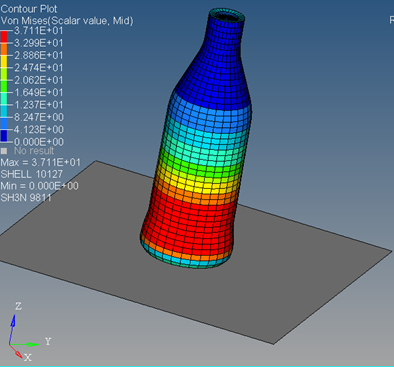
Figure 13.