Split Surfaces
Use the Split tool to create fixed points to split/unsplit surface edges and split surfaces with points, lines, planes, or other surfaces.
Split Surface Edges
Use the Split with Points tool to split surface edges.
-
From the Geometry ribbon, Edit
tools, click the Split with Points tool.

Figure 1.
- Use snap points to create fixed points at predefined points on your model such as end, middle, and center points.
- The untrim action is meant to be used on split lines or scratches fully contained inside a surface. It will also work on split lines that separate surfaces completely if the surface construction definition allows it, for example if the surfaces were previously split using this or other HyperWorks X tools.
- When using box selection to remove multiple vertices, the global Geometry Feature Angle will be used. You can manually remove individual vertices between edges with an angle larger than the global Geometry Feature Angle.
Split Surfaces and Solids with Points
Use the Split with Points tool to split surfaces and solids with points, nodes paths, or node lists.
-
From the Geometry ribbon, Edit
tools, click the Split with Points tool.
Figure 2.
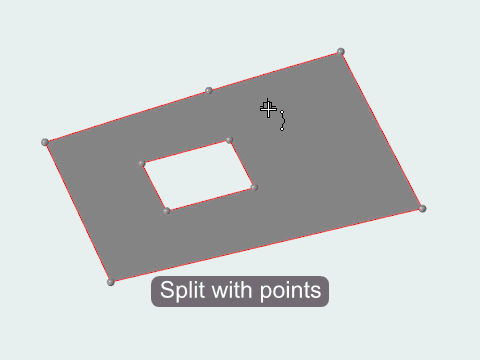
Figure 3.
Split Surfaces and Solids with Lines
Use the Split with Lines tool to split surfaces or solids using lines, offset lines, and graphical lines.
-
From the Geometry ribbon, Edit
tools, click the Split with Lines
tool.

Figure 4. - Optional:
On the guide bar, click
 to define split
options.
to define split
options.
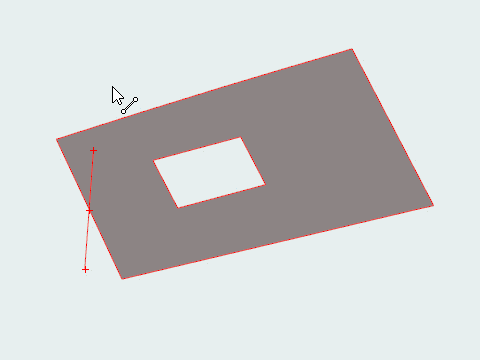
Figure 5.
- Draw lines that are perpendicular or tangent to other lines by snapping to predefined points such as end, middle, center, and intersection points. You can also snap to points along the x, y, and z axis.
- On the guide bar, click
 to open the
Advanced Selection dialog, from which you can
filter geometry further by selecting a subset of entities based on
additional selection methods, such as By Component or By
Assembly.
to open the
Advanced Selection dialog, from which you can
filter geometry further by selecting a subset of entities based on
additional selection methods, such as By Component or By
Assembly.
Split Surfaces, Solids, and Lines with Planes or Surfaces
Use the Split with Plane tool to split surfaces, solids, or lines with a plane or a surface.
-
From the Geometry ribbon, Edit
tools, click the Split with Plane
tool.

Figure 6.
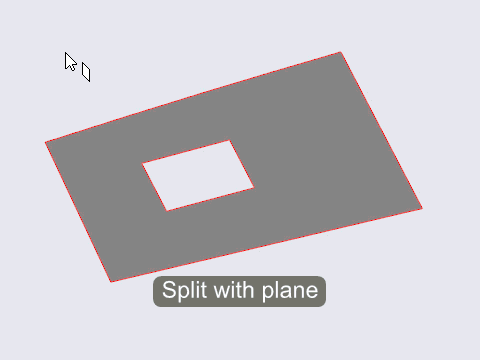
Figure 7.
- Select a splitting plane using reference entities or features that are disconnected from the geometry you want to split, including points in space.
- You can modify your surface selection after selecting a splitting plane. Split preview lines will update appropriately.
- Use snap points to snap the splitting plane to predefined points on lines and surfaces, such as middle and end points. Clicking a snap point automatically selects attached surfaces/solids.
- On the guide bar, click to open the
Advanced Selection dialog, from which you can
filter geometry further by selecting a subset of entities based on
additional selection methods, such as By Component or By
Assembly.
Split Options
Split with Points
- Extend trimmer
- Extend the trim beyond the trimmer boundaries.
Split with Lines
- Line types
- Set the line selection filter.
- Keep line endpoints
- Retain the line end points as fixed points on the trimmed surface.
- All attached surfaces
- Create a new offset trim line on each surface that the selected lines belong to.
- Select closed loops
- Automatically selects closed loops of line segments when picking lines.
- Smooth line
- Create a curved line passing through the selected points
- Close line
- Create a closed loop between the first and last selected points.
- Fill cut loops
- Create a new surface if the edges being split form a closed loop.
- Extend trimmer
- Extend the trim beyond the trimmer boundaries.
Split with Plane
- Fill cut loops
- Create a new surface if the edges being split form a closed loop.
- Trim both
- Trim both the target and tool entities.
- Extend trimmer
- Extend the trim beyond the trimmer boundaries.
- Self-intersecting surfaces
- When this feature is active, every selected surface is trimmed at their
intersections with each other. This is very similar to using the trim
both option when trimming with surfaces, except that you simply select a
single mass of surfaces and HyperWorks X sorts them all
out and trims each one whenever it intersects any other selected
surface.
This feature is useful when dealing with cases such as a grid of intersecting surfaces. Using the intersecting surfaces trim option allows you to separate all of the intersecting surfaces into multiple smaller surfaces with a single action, instead of having to trim them in pairs.
Note: This option is accessed by clicking on the guide bar.
Keyboard Shortcuts & Mouse Controls
| To do this | Press |
|---|---|
| Continue from the previous point | Ctrl + Left Mouse Click |
| Toggle selection | Tab |
| Switch the split orientation from normal to tangent before selecting the splitting plane | Shift |
| Delete fixed points and split lines | Shift + Left Mouse Click |
| Deselect surfaces, solids, lines, or nodes | Shift + Left Mouse Click |
| Exit tool | Esc |