Matrix Browser

Use the Matrix Browser to explore the HyperMesh and HyperView data entities and export the entities to external files for further analysis.

To open the Matrix Browser, click Tools > Matrix Browser from the menu bar.

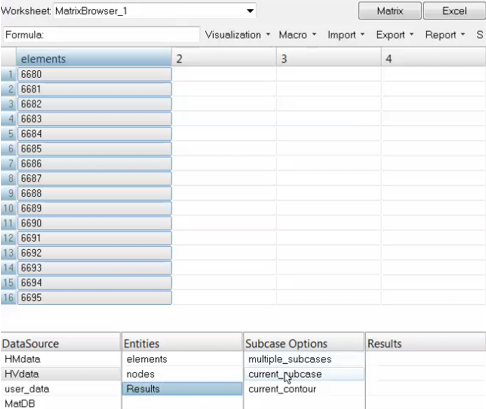
The Matrix Browser is organized into two main sections. The top half of the browser provides a table view similar to an Excel spreadsheet. The bottom half of the browser shows and allows you to browse the HyperMesh/HyperView (data source) and its data entity (object) names and their data names (attributes). The HyperMesh database entities are shown in green and the HyperView database entities are shown in yellow. When you select a column in the table it becomes an active column and is highlighted in blue. All of the following searches are conducted on the active column.
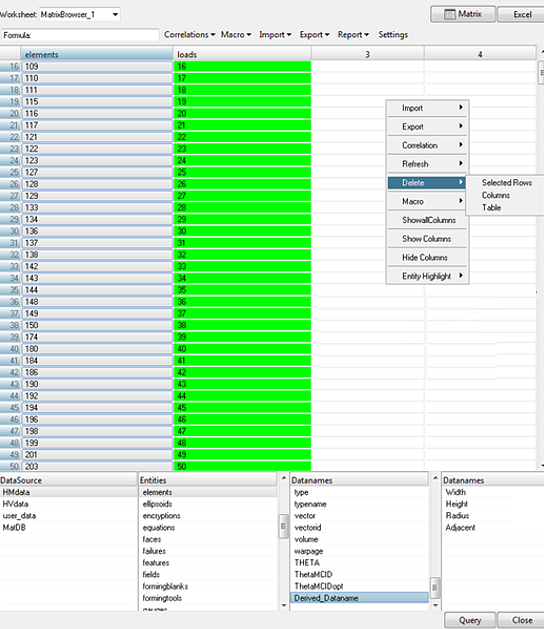
The Matrix Browser's context menu contains functionality unique to the browser.


Figure 1.

Matrix Browser Functionalities

Below is a highlight of the functionalities supported by the Matrix Browser.
  • Query and modify HyperMesh and HyperView data entities without writing cumbersome Tcl coding.
  • Export HyperMesh and HyperView data to an Excel file for further post-processing and report generation.
  • Establish a link between HyperMesh and HyperView in order to access model data, such as material, property, beam section, and results data in a single environment. The browser supports the selection of multiple load cases from the HyperView results database.
  • Create new procedures (macros) to enable automation with minimum Tcl coding and also capture the automation process as Tcl scripts. These macros can be used external to the Matrix Browser, like the tools in the Altair script exchange.
Note: The Matrix Browser does not allow for the creation of new HyperMesh entities. The tool queries and modifies existing entity data. The browser also does not allow extensive geometry (lines, surface, solids) data query. It is intended for FE data and results that are already in the HyperMesh/HyperView databases.

Prepare to Use the Matrix Browser

  1. Open an existing HyperMesh model or import solver data.
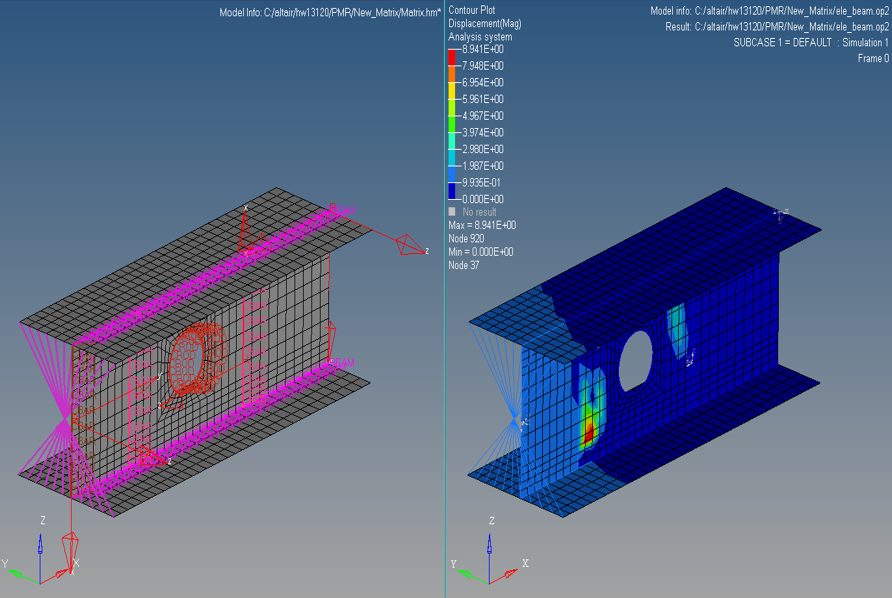
  2. Use the split screen and invoke HyperView.
  3. Load the results file for the solved data into HyperMesh.
  4. Click Tools > Matrix Browser from the menu bar in HyperMesh.


    Figure 2. . Model opened in HyperMesh and HyperView.
    Note: HyperView is only needed if the results are accessed from the Matrix Browser. Use HyperWorks Desktop to access HyperView functions from HyperMesh in the browser.

Access HyperMesh Data Using the Matrix Browser

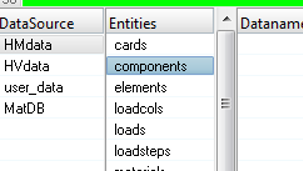
  1. In the DataSource column, select HMdata.
  2. In the Entities column, select an HyperMesh entity.
  3. Click Query.
  4. In the panel area, use the entity selector to select HyperMesh entities to add to the matrix.
    A new green colored column is added to the matrix.
  5. In the matrix, click the elements header to access entity data.
    The elements column turns blue when clicked, indicating the entities are active for the search operation. The Datanames column is populated with entity attributes from the HyperMesh database for the element IDs shown in the elements column.


    Figure 3.
  6. Select the material, property, or any other attribute(s) and click Query.
    One of more columns will be added. If you selected material, the material IDs will be shown.
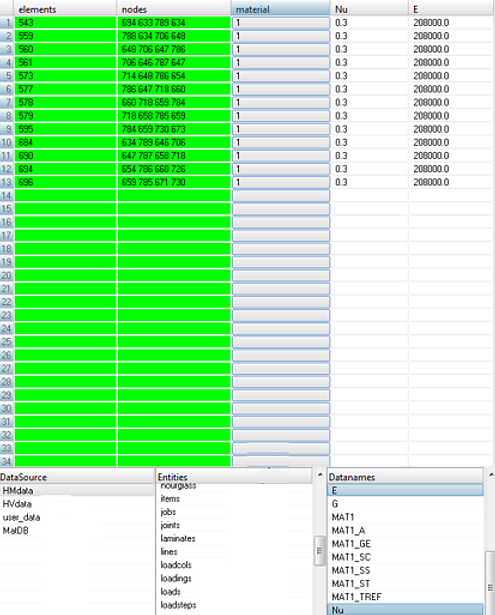
  7. The next step is to get E, Nu from the material. Activate the material column, and then select E and Nu from the data names.


    Figure 4.
  8. Click Query.
  9. Repeat this process for property and get the element thickness.
Derived data is not stored in HyperMesh data. It is calculated by a procedure predefined by the Matrix Browser to calculate useful data from HyperMesh data. You can create these Tcl procedures and store them in the Matrix start up. They will show up in the browser as derived_datanames. The pre-installed derived_datanames are width, height, radius and adjacent.

Access HyperView Results From the HyperMesh Database

Access HyperView Results From the HyperMesh Database with Multiple Subcases

  1. In HyperWorks Desktop, split the graphics area into two windows. In the first screen, use HyperMesh to load the model files. In the second screen, use HyperView to load results files.
  2. From the menu bar, click Tools > Matrix Browser.
    The Matrix Browser opens.
  3. In the DataSource column, select HMdata.
  4. In the Entities column, select the required element directly or select components, material, property, or sets.
  5. In the DataSource column, select HVdata.
  6. In the Entities column, select Results.
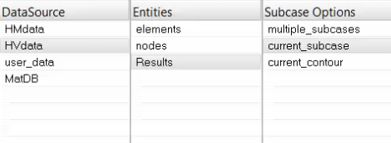
  7. In the Subcase Options column, select multiple_subcases.


    Figure 5.
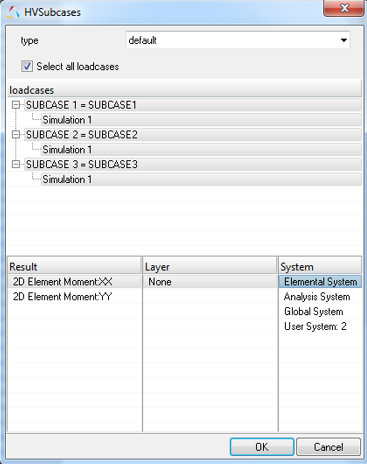
  8. Select the results type(s) available in the solver results.


    Figure 6.
  9. Select layer information (if available) and the results system in which the results are to be interpreted.
    User-defined system results are available as long as a system is available in HyperView.
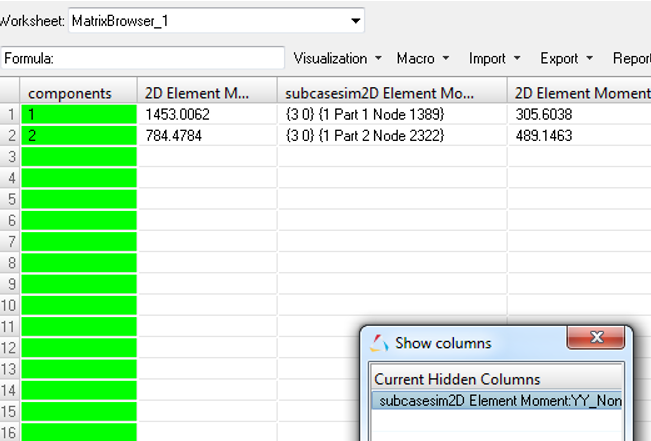
  10. By default, the matrix only displays the results for each subcase in separate column. Retrieve additional information by right-clicking and selecting Show all columns from the context menu.

Access HyperView Results From the HyperMesh Database with the Current Subcase

Current_subcase selection is the same as multiple_subcase, except that it provides the ability to create multiple worksheets when you run the macros.
  1. In HyperMesh Desktop, split the graphics area into two windows. In the first screen, use HyperMesh to load the model files. In the second screen, use HyperView to load results files.
  2. From the menu bar, click Tools > Matrix Browser.
    The Matrix Browser opens.
  3. In the DataSource column, select HMdata.
  4. In the Entities column, select the required element directly or select components, material, property, or sets.
  5. In the DataSource column, select HVdata.
  6. In the Entities column, select Results.
  7. In the Subcase Options column, select current_subcase.


    Figure 7.
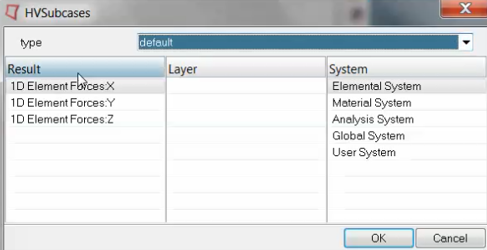
  8. Select the results type.
  9. In the HVSubcases dialog, select layer and system information.
    Results for the current subcase display in the column.


    Figure 8.
  10. From the Macro pull-down, click Save.


    Figure 9.
  11. From the Macro pull-down, click Run.
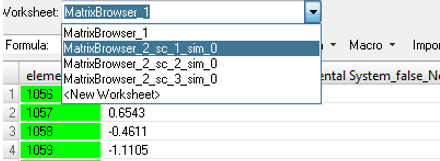
  12. After the macro is finished running, you will be asked to select the load case. If you select multiple load cases, separate worksheets will be created for each load case as in the case of current load case.


    Figure 10.
  13. Select the worksheet corresponding to the simulation.

Access HyperView Results From the HyperMesh Database with the Current Contour Results

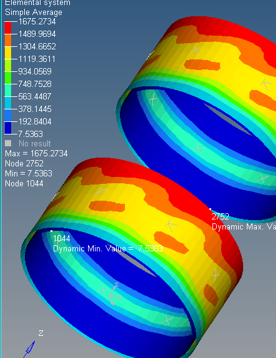
  1. In HyperView, select the required results and contour data.


    Figure 11.


    Figure 12.
  2. From the menu bar, click Tools > Matrix Browser.
    The Matrix Browser opens.
  3. In the DataSource column, select HVdata.
  4. In the Entities column, select Results.
  5. In the Subcase Options column, select current_contour.


    Figure 13.
  6. The current contour selection does not prompt you for load case, layer, or system information. The displayed results are queried in HyperView and sent to the matrix.

Query Max/Min Results for Components/Sets/Materials/Property

When you query max/min results for component/sets/material /property, HyperMesh will search the max/min values for the elements in that component and provide single values and the element ID/load case ID where that values occurs.
  1. In the DataSource column, select HMdata.
  2. n the Entities column, select components, sets, materials, or property.


    Figure 14.
  3. In the DataSource column, select HVdata.
  4. Select results and the required data type.
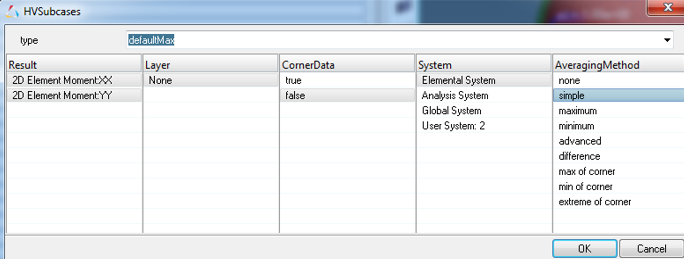
  5. In the HVSubcases dialog, select layer, corner data type, system, and averaging methods.


    Figure 15.
    The max/min results for that component display. In a separate column, additional data lines display the loads case and node/element information for the particular data.


    Figure 16.

Create Notes in HyperView

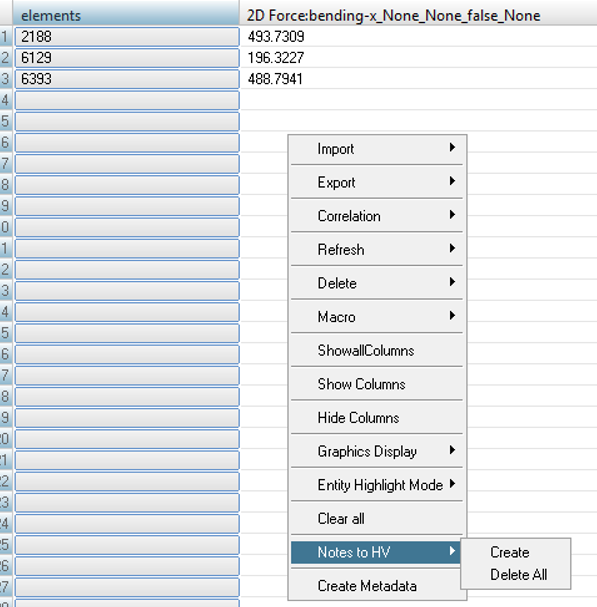
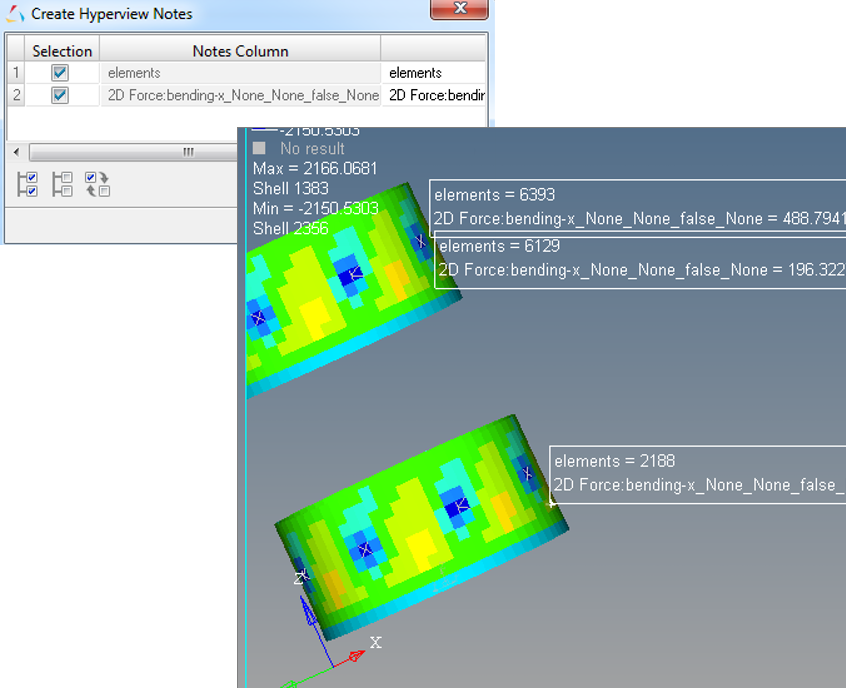
In the Matrix Browser, you can create and delete annotations (HV-notes) for selected column results using the right-click context menu option Notes to HV.


Figure 17.


Figure 18.

Create and Retrieve User Data in the Matrix Browser

It is often useful to add additional data that is not in the HyperMesh or HyperView databases, which is known as user data.
  1. Click user_data in the Data Source column.
  2. Click Create in the user variables GUI column.
  3. Click double in the variable types column.
  4. Click Query.
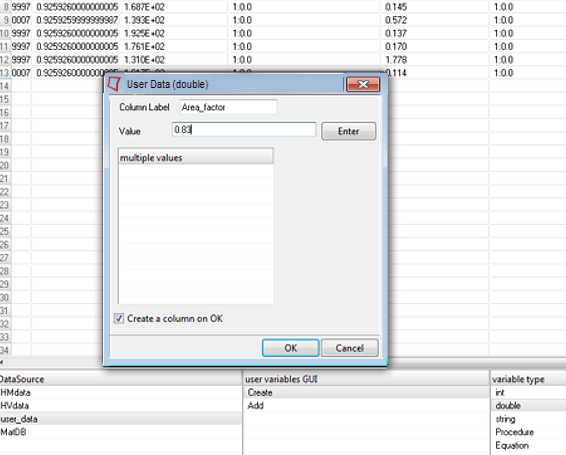
  5. In the dialog, provide the column label name, select Multiple values, and activate the Create a column on OK checkbox.


    Figure 19.
  6. Click OK.
    The user data is added to the Matrix Browser.
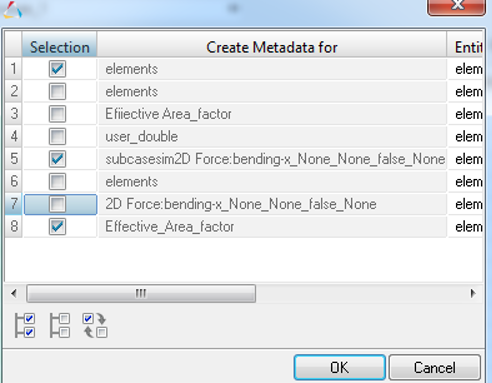
  7. In the matrix, right-click on the user data you created and select Create Metadata from the context menu.
  8. In the dialog, select entities to create metadata for.


    Figure 20.
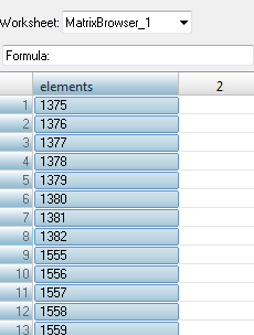
  9. Retrieve this data using entity based metadata.


    Figure 21.

Work with Microsoft Excel

  1. Once the HyperMesh, HyperView and user data is gathered in the Matrix Browser, the data can be exported to Excel by clicking Excel in the top right-hand corner of the browser.
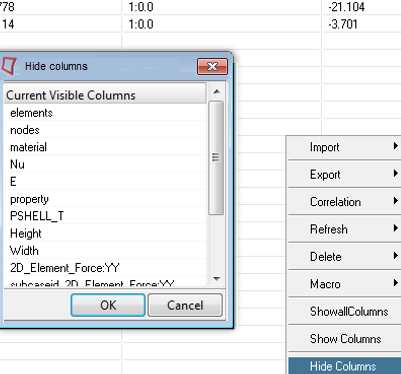
  2. You can hide some of the columns that are not needed for export by right-clicking and selecting Hide Columns from the context menu.


    Figure 22.
  3. You can also add more columns. To import the new column(s) from Excel into the Matrix Browser, click Matrix.

Display Data in HyperMesh or HyperView

  1. Display data in HyperMesh.
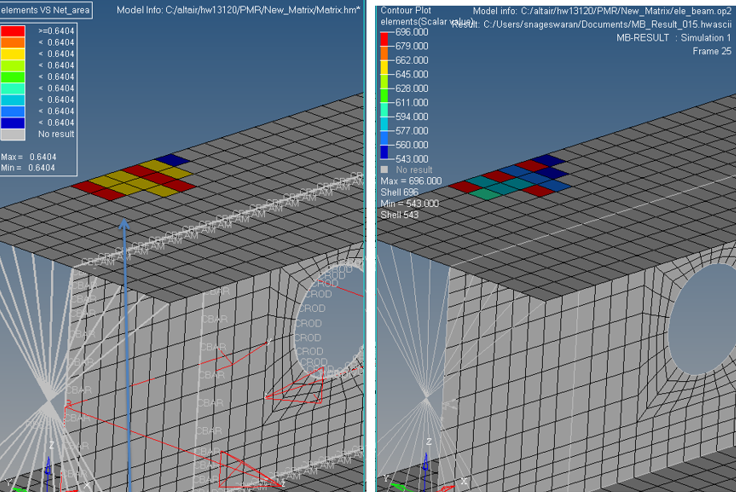
    1. Click Correlations > Contour.
      A dialog opens.
    2. Select elements for the Entity Column label and Net_area for the Column on Y field.
    3. Click OK.
      The contour appears in HyperMesh.
  2. Display data in HyperView.
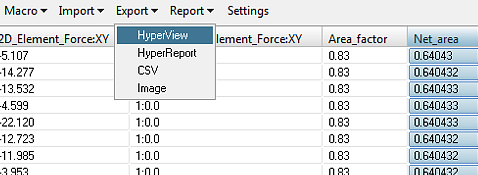
    1. Click Export > HyperView.
    2. Select a column to export.
      The exported data will appear in HyperView. You can post-process this data in the same manner as other HyperView data types.


      Figure 23.


      Figure 24. . Contouring in both HyperMesh and HyperView.

Add TCL Calculation Procedure

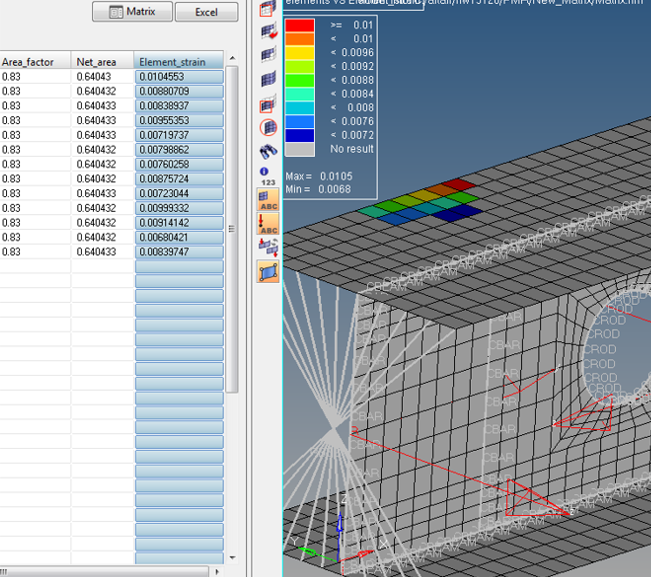
HyperMesh has a built in scripting language based on Tcl programming language. Tcl is used to access HyperMesh and HyperView functionalities\methods as well as internal data. The following example calculates element strain (yy) from element 2D-Force-YY for a shell element.
  1. Click user_data in the Data Source column.
  2. Click Create in the user variables GUI column.
  3. Click Procedure in the variable type column.
    A dialog opens.
  4. Enter the column and function name.
  5. Activate the Create a column on OK checkbox.
  6. Add the following Tcl code, based on Matrix and column names, then click OK.
    proc Element_strain_calc  { } {
      set force_fyy[::MatrixBrowser::getColumn2D_Element_Force:YY]
      set width [::MatrixBrowser::getColumn Width]
      set young_mod [::MatrixBrowser::getColumn E]
      set thickness [::MatrixBrowser::getColumn PSHELL_T]
     set Strain_yy ""
     set Strain_yy [expr $force_fyy/$width/$thickness/$young_mod]
     return $Strain_yy
    }


    Figure 25. . Element_strains are calculated and displayed.

Store and Reuse the Procedures Outside of the Matrix Browser

The process developed in the previous section can be stored as a macro (script) and can be reused with another HyperMesh data model or other HyperView databases.
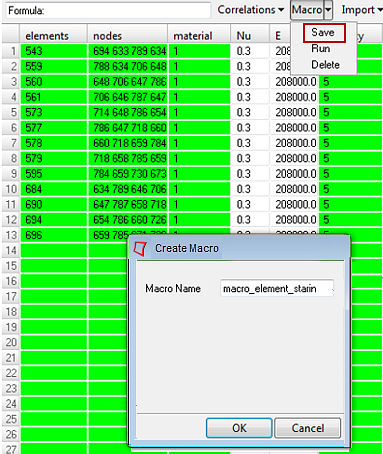
  1. Click Macro > Save.
  2. Enter the Macro Name in the dialog and click OK.
    This macro can also be added to the menu bar and accessed and run without using the Matrix Browser. The scripts are stored and can be reused like other HyperWorks scripts without the Matrix tool.


    Figure 26.

Context Menu

The Matrix Browser's right-click context menu contains additional browser options.
Option Description
Import Import Matrix or CSV.
Export Export HyperView or CSV.
Correlation Select Contour, Shape, Vector, or Plot.
Refresh Refresh the Matrix Browser or HyperMesh session.
Delete Delete selected rows, columns, or the whole table.
Macro Save or run the macro.
Show all Columns  
Show Columns  
Hide Columns Hide some of the columns that are not needed for export.
Entity Highlight Select Show all, Show, Hide, Isolate, or Isolate Only.
Clear all Clear the table.
Notes to HV Create or delete notes.
Create Metadata Create and save metadata for user data selected in the matrix.