The steps below outline how to import a CAD file using the Import Geometry
dialog.
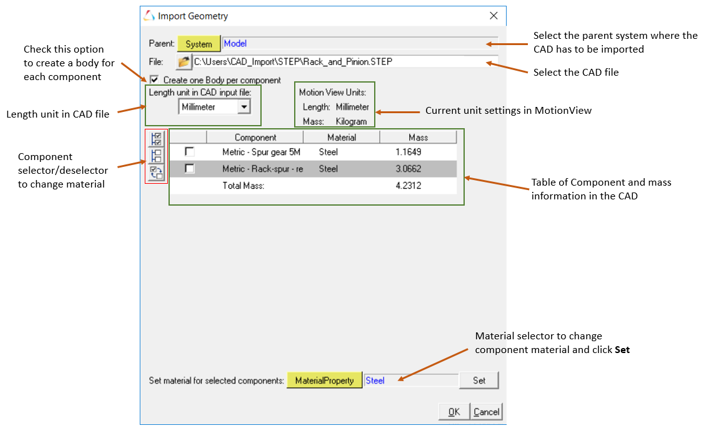
From the File menu, select Import > Geometry to display the Import Geometry dialog.
Select the Parent system into which the CAD has to be imported.
Select the importing CAD file using the File
selector.
MotionView will read the CAD and the components
and display in the table. It will also identify the length unit that the CAD was
built in (if that information is available).
Figure 1.
Change the material of any component if needed.
Select the check box from the first column in the table across the
component(s). The selector/deselector can be used to select
All/Select
None/Flip Selection.
Click on the MaterialProperty collector and
select the appropriate material.
Click Set.
Review the Component and Mass information and click
OK.