Adding Events to the Model
The following steps outline how to add an events to the previously built model.
Currently, there are sixteen event types available in the Advanced Driver models:
- Constant Radius
- Single Lane Change
- Double Lane Change
- Swept Sine
- Straight Line Acceleration
- Straight Line Braking
- Sinusoidal Steering
- BrakeIn Turn
- J Turn
- Throttle off cornering
- Swept Steer
- Pulse Steer
- Throttle off TurnIn
- Step Steer
- Power off ln Straight Line
- Altair Driver File (if you have a .adf file that needs to be executed)
- Road Course
- n-Post
Each event type has different options that need to be addressed. For example, the Single Lane Change event is explained in the following steps.
-
Right-click on the Model in the Project Browser and click Add
Events.
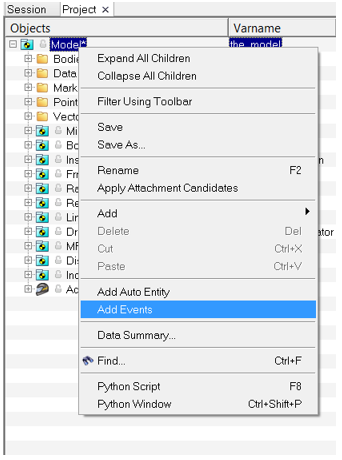
Figure 1.The Add Scripted Driver Task dialog is displayed.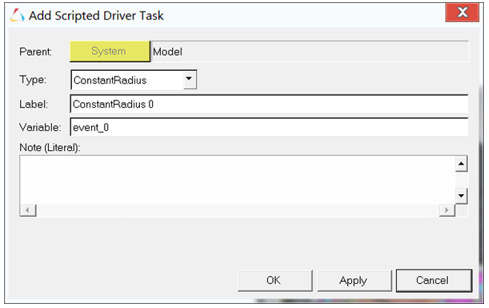
Figure 2.- OK
- Applies the selected type and closes the window.
- Apply
- Adds the event without closing the window.
- Cancel
- Exits the wizard.
-
Select the Single Lane Change required event type from
the Type drop-down menu.
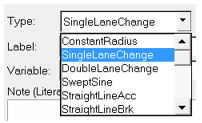
Figure 3. -
The Event Editor is displayed in the panel area.

Figure 4. -
Open the Event Editor by right clicking on the event type in the Project Browser and selecting Event
Editor.
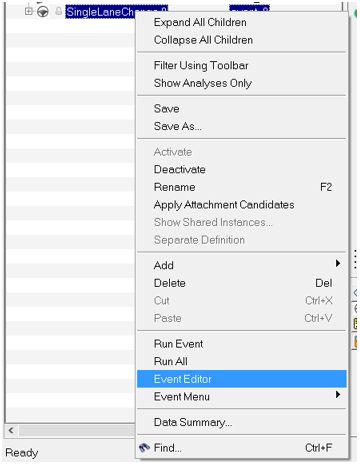
Figure 5.Or
Click the Event Editor button in the panel area.
Figure 6. -
The Single Lane Change event’s parameters are displayed.
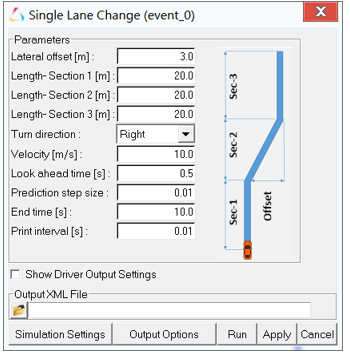
Figure 7. -
Click on the Simulation Settings button to enter the
required data.
This dialog invokes the same options as in the Run panel.
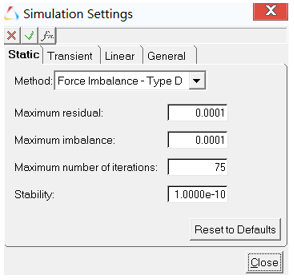
Figure 8. -
Click on the Output Options button to enter the required
data.
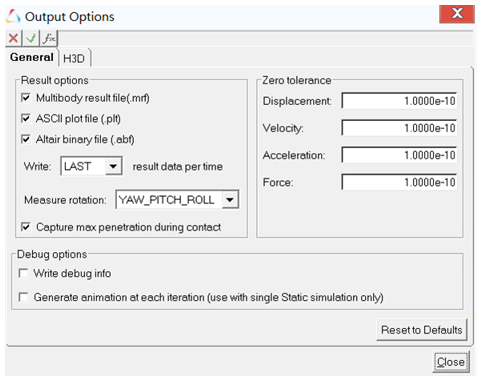
Figure 9. -
The Event Menu options are explained below:
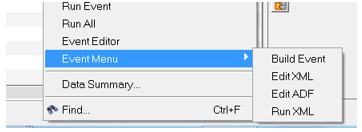
Figure 10.- Build Event
- Applies the event to the model and it exports the .xml and .adf files.
- Edit XML
- Used to edit the XML file in a text editor.
- Edit ADF
- Used to edit the ADF file in a text editor.
- Run XML
- Solves the XML file browsed in the dialog.