Using the MotionSolve Subroutine Build Tool to Create Shared Libraries
The Altair Subroutine build tool is included the MotionSolve installation for both Windows and Linux.
Follow these steps to build a MotionSolve-compatible shared library using available source code.
-
To launch the Build tool on Windows:
-
Click Start > All Programs > HyperWorks <version
number> (64-bit) > Tools > MotionSolve Subroutine
Builder.
The MotionSolve Subroutine Builder dialog is displayed:
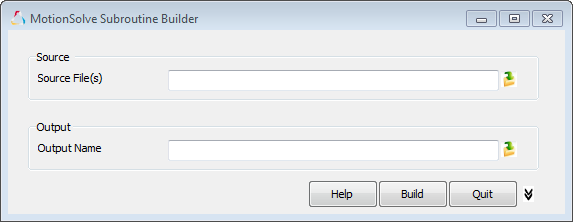
Figure 1.
-
Click Start > All Programs > HyperWorks <version
number> (64-bit) > Tools > MotionSolve Subroutine
Builder.
-
To launch the Build tool on Linux:
-
The build tool may be launched from the desktop icon or from the
command line by navigating to
<altair_root>/altair/scripts/ and issuing
the following command
./motionsolve_subroutine_builder.
This displays the dialog shown below:
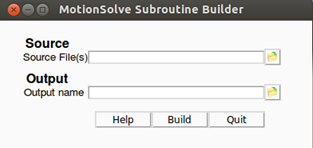
Figure 2.
-
The build tool may be launched from the desktop icon or from the
command line by navigating to
<altair_root>/altair/scripts/ and issuing
the following command
./motionsolve_subroutine_builder.
-
Specify the source code or the object files that you will be using to build the
shared library. The following are valid source file types and can be used to
build a shared library:
- C++ source code (*.c, *.cpp, *.cxx)
- Fortran source code (*.f, *.f90)
- Fortran or C/C++ object files (*.obj in Windows, *.o in Linux).
- A combination of the above.
Note: The source code or object files must all be located in the same directory. You must have write-to-disk permissions for this directory. If you do not have write-to-disk permissions for this directory, please copy the source code to a location where you have write-to-disk permissions. -
To specify the source/object files, click
 next to the Source File(s) text box:
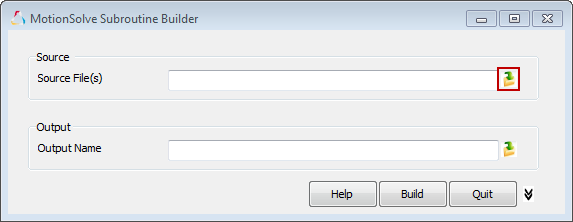
Figure 3. Specifying Source Files - Navigate to your working directory and choose the source files as required. You can choose multiple files by pressing the CTRL key while clicking the file names, or by clicking and dragging your mouse pointer.
-
Click Open to select these files.
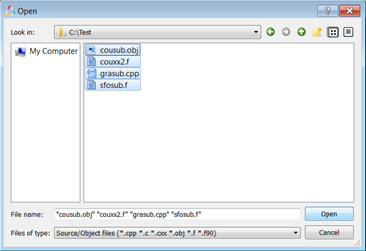
Figure 4. Choosing Source Files - Specify the output directory and file name for the shared library. Again, you must have write-to-disk permissions for this directory.
-
Click
 next to the Output Name text box.
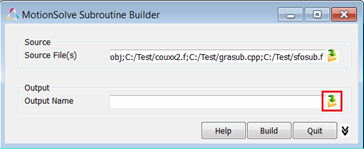
Figure 5. Specifying the Output File and Location -
Navigate to the directory where you would like the shared library to be built.
Enter a name for your library in the File name text field. Click
Save to continue.
Note: The shared library name must contain only alphanumeric characters (A-Z, a-z, 0-9) with the exception of the underscore ("_") character.
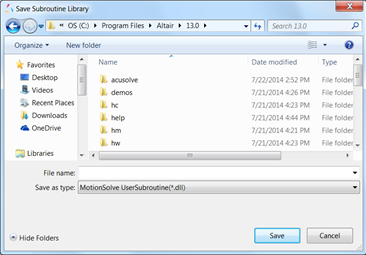
Figure 6. Specifying the Output File and Location -
To build your shared library, click Build.
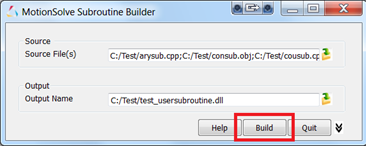
Figure 7. Build the Source Code -
For the Windows platform, if you have multiple compilers installed on your
computer, you can choose which compiler to use while building your shared
library:
Upon building the source files successfully, you should see the following dialog box:
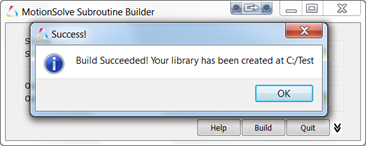
Figure 8. Build CompletedAdditionally, you will see the shared library built by the tool in your working directory (C:\Test in this case). You can use this library in a MotionSolve simulation.
The tool also creates a temporary directory inside your working directory while building the shared library. The contents of this temporary directory can be used for debugging and informational purposes.
The temporary directory created inside your working directory contains some useful information:- build.bat: a batch file that contains the compiler and linker commands used to build the shared library.
- build_output.log: a log file that contains
messages from the compiler and linker. The contents of this file are
useful when debugging an unsuccessful build.
For a successful build, this directory also contains compiled objects, the linked library, and other temporary files. If you specified only C/C++ source files and/or object files, the tool also creates a Microsoft® Visual Studio® solution file in this directory.
-
If, however, your build is unsuccessful, the following dialog box is
displayed:
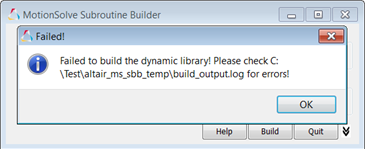
Figure 9. Build Completed - To investigate the cause of build failure, look at the build_output.log file at the location stated in the dialog box above. This file typically contains compiler/link time errors or warnings that may help you debug your source code.
- After you have finished, exit by clicking Quit. If you built a shared library before quitting, you are given the option to remove the temporary folder created by the tool.