Remove Run Files from the Study Directory
During and/or after an evaluation, use the Purge tool to minimize the size of your study directory by removing unnecessary run files.
The Purge tool displays a list of all the files available for purge, which are sorted by size. Any files that are smaller than 10kb will not be listed in the Purge tool because they do not pose as a problem to disc space usage.
-
In the Run Tasks tab, Purge cell, click
 .
The Purge dialog opens.
.
The Purge dialog opens.
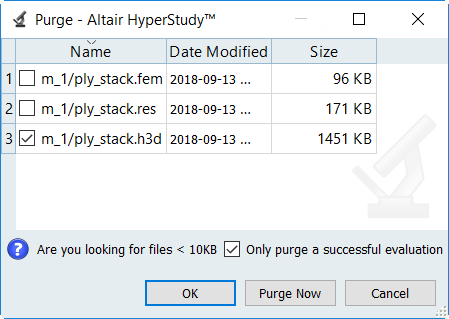
Figure 1.
Tip:
- Apply your purge selection to future approaches by selectinb the
Purge checkbox from the Run Tasks tab. For
example, the purge selection that you make in the Study setup will be
inherited by all of the study approaches.
You can modify your purge selection for each study approach.
- Only purge files when an evaluation is successful by selecting the Only purge a successful evaluation checkbox. The files associated with failed runs will remain on disk to enable you to perform post-mortem debugging.