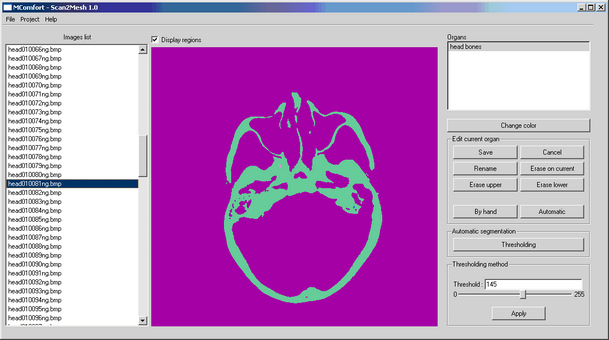
Scan2Mesh graphical interface is divided into four parts:

Scan2Mesh user’s main interface
Menu Bar
You can choose the following options from the Menu bar:
File
| • | New project: load a list of image files and find information about their characteristics (slices thickness, pixels dimensions) |
Project
| • | Load project : load a project file containing a list of images and characteristics, organs, etc. |
| • | Save project : save a project file containing a list of images and characteristics, organs, etc. |
| • | Scanner values : find the slices' thicknesses and the pixel dimensions |
Help
| • | About : display Scan2Mesh version |
List of Images
From the Images list, select the image to be displayed in the visualization area.
Visualization Area
Displays the image selected in the image list and interacts with you to allow region selection or hand-drawing.
Activate the Display regions check box to display identified regions by automatic methods.
Display regions
Organs Menu
Organs List
Scroll through the list to select and display organs.
New Organ
Create a new organ.
Erase Organ
Erase the selected organ.
Mesh Organ
Show the meshing interface.
Edit Organ
Show the edition sub-menu.
Change color
Change the display color of selected organs.
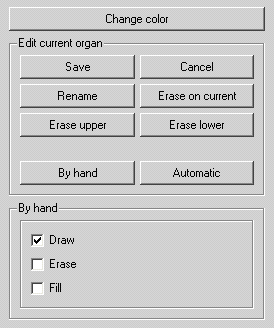
Edition Sub-Menu
Save
Save the modifications performed on the selected organ.
Cancel
Cancel the modifications performed on the selected organ.
Rename
Rename the selected organ.
Erase on Current
Erase the organ’s contour on the displayed image.
Erase Upper
Erase the organ’s contour on all images above the displayed one.
Erase Lower
Erase the organ’s contour on all images below the displayed one.
By Hand
Display the By hand drawing menu:
| • | Draw: allows drawing on the displayed image (left-click) |
| • | Erase: erase pixels on the displayed image (left-click) |
| • | Fill: fill a closed contour drawn by hand |
| • | Fill undo: undo last filling |
By-hand drawing sub-menu
Automatic
Display the Automatic segmentation menu:
| • | Thresholding: identify regions on the set of images by defining a threshold separating organs from everything else |
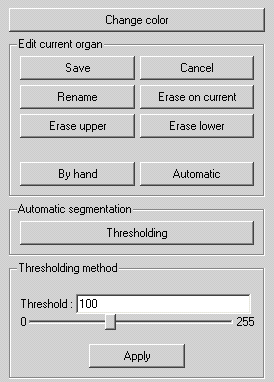
Thresholding sub-menu


