HyperMesh/HyperWorks Mouse Mode
|
Task
|
Description
|
Rotations
|
| • | Press the CTRL key + left mouse button and move the mouse around. The model rotates with the movement of the mouse. |
| • | Release the left mouse button and press it again to rotate the model in a different direction. |
| • | Press the CTRL key and quick-click the left mouse button anywhere on the model to pick a new center of rotation. Press the CTRL key + left mouse button to rotate the model on this new center of rotation. |
|
Translations
|
| • | Press the CTRL key + right mouse button and move the mouse around. The model is panned (translated) according to the mouse movement. |
|
Zoom
|
| • | Press the CTRL key + middle mouse button, move the mouse around, and then release the mouse button. |
| • | A white box is drawn according to the area of the mouse movement. When the mouse button is released, HyperCrash zooms in on the portion of the model where the box was drawn. |
| • | Press the CTRL key + quick-click the middle mouse button. The model is fitted to the graphic window. |
| • | Press the CTRL key and spin the mouse wheel. The model zooms in or out depending on which direction you spin the mouse wheel. |
|
Classic HyperCrash Mouse Mode
|
Task
|
Description
|
Rotations
|
Middle + right mouse button:

| • | Press the C key and pick a node with the left mouse button to change the center of rotation. |
| • | Press the CTRL and C keys to switch OFF the automatic center of rotation. |
| • | Press the SHIFT and C keys to switch ON the automatic center of rotation. |
|
Translations
|
Right mouse button:

|
Zoom
|
| • | Zoom in: middle mouse button and slide up: |

| • | Zoom out: middle mouse button and slide down. |
| • | Zoom box in: press the Z key and drag a box in the graphic window with the left mouse button. |
| • | Zoom box out: press the SHIFT and Z keys and drag a box in the graphic window with the left mouse button. |
|
Display Controls
|
Display/hide controls
|
| • | Press the SHIFT key + left mouse button to display a part using quick windows in any panel, as long as you are NOT in entity selection mode. |
| • | Press the SHIFT key + right mouse button to hide a part using quick windows in any panel, as long as you are NOT in entity selection mode. |
|
Pre-highlight
|
| • | Press the CTRL-SHIFT keys + left/right mouse button, move over the part to pre-highlight. |
| • | Release the mouse button to display/hide the part. |
|
Entity Selection
|
Advanced selection
|
| • | Press the SHIFT key + left mouse button to add an entity to the selection using quick windows in a selection mode. |
| • | If in selection mode for nodes, SHIFT will add nodes. |
| • | Press the SHIFT key + right mouse button to remove an entity from the selection using quick windows in a selection mode. |
| • | If in selection mode for nodes, SHIFT will remove nodes. |
|
Single entity selection
|
| • | In entity selection mode, in a shaded mode for mesh, the selection will only apply to entities on the outside area of the screen. |
| • | Click in the graphics area, as long as there is a corresponding entity nearby, HyperCrash selects something. |
| • | A node is selected, even if the mouse cursor is not extremely close to the node. HyperCrash identifies which element is in the area of the mouse and finds the closets node. |
|
Reselection
|
Note: If using Linux, the user must modify their system preferences to enable this feature, as the ALT key is reserved.
|
Ellipse/Circle Selection
|
Ellipse
|
| • | Holding the SHIFT key while making a selection will change the standard circle to ellipse. |
|
Keyboard functions
|
Display entities
|
| • | Use the F5 key to display all the rigid walls. |
| • | Use the F6 key to display all the rigid bodies. |
| • | Use the F7 key to display all the initial velocities. |
| • | Use the F8 key to display all the free nodes (in white). |
| • | Use the SHIFT + F5 keys to display all the added masses. |
| • | Use the SHIFT + F6 keys to display all the boundary conditions. |
| • | Use the SHIFT + F7 keys to display all the interfaces. |
| • | Use the SHIFT + F8 keys to remove all the options from the screen. |
|
View settings
|
| • | Use the F9 key to display the model in the XY plane. |
| • | Use the F10 key to display the model in the YZ plane. |
| • | Use the F11 key to display the model in the XZ plane. |
| • | Use the F12 key to display the model in a perspective view. |
| • | Use the P key to switch to orthogonal or perspective view. |
| • | Zoom in: press the up arrow  key on the keyboard. key on the keyboard. |
| • | Zoom out: press the down arrow  key on the keyboard. key on the keyboard. |
|
Background options
|
| • | Use the S key to display the standard background color. |
| • | Use the W key to display a white background color. |
| • | Use the B key to display a black background color. |
|
Highlight option
|
When highlighting a part using the  button, use the: button, use the:
| • | plus (+) key to decrease the transparency. |
| • | minus ( - ) key to increase the transparency. |
|
Other shortcut keys
|
Use the:
| • | CTRL+F keys to refresh the display ( ). ). |
| • | CTRL+R keys to fit the model to the display ( ). ). |
| • | CTRL+S keys to view all parts of the model ( ). ). |
| • | CTRL+N keys to active the function show node info ( ). ). |
| • | CTRL+E keys to active the function show element info ( ). ). |
| • | CTRL+P keys to active the function pick part info (  ). ). |
| • | CTRL+O keys to active the function show object info ( ). ). |
| • | CTRL+D keys to active the function distance between two nodes ( ). ). |
| • | CTRL+A keys to active the function angle between three nodes ( ). ). |
| • | CTRL+Z keys to active the function display part in node proximity (  ). ). |
| • | CTRL+W keys to active the function display the connected part (  ). ). |
|
Mouse functions
|
Quick clicks
|
| • | Click the red 'x' located at the right of the tab to close the tab. |
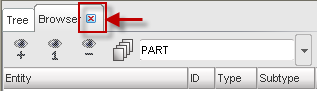
| • | Right-click the mouse at the tab toggles between the opened tabs |
|


